Media & Documentary: Module 2

Image Credit: Simon Dawson, 2016. Kibali Gold Mine Photographic Essay
https://www.bloomberg.com/news/photo-essays/2016-12-08/kibali-gold-mine-photo-essay

For this weeks activity, I researched a few different photographic essays on the subject of gold mining. I found that most of them featured lots of landscape style shots, in full colour. The colour of the machinery kept vibrant as if to create a juxtaposition between the machinery itself and the often drab appearance of the surrounding natural environment. The use of colour helps to deepen the viewers immersion into the story of the gold mining processes, the effect on the surrounding environment and the hard working conditions for the miners.

I am leaning towards the gold mining history of my hometown for my photographic essay. At present there are two possible directions for the essay. One would be of a historical nature and for this perhaps a black & white or sepia tones aesthetic would suit, similar to some of the vintage gold mining images below ( taken from bendigoheritage.com.au)

Alternatively, if the essay takes the direction of the involvement of the Chinese immigrants in our own gold mining history and their subsequent influence on the city in the present day, a more vibrant, colourful style should be used to really capture the essence of the Chinese culture. Colour plays an important role in their traditions and it would seem counter intuitive not to use this colour in the images. Below is an image of the Joss House temple in black and white and colour for comparison.

For my second topic, I researched some publications that feature stories from families and people suffering terminal illness.

Two examples of these are LifeSupport magazine and the Peter Mac Magazine.

I found this website that featured a photo essay following the stories of five women with metastatic breast cancer.

https://petapixel.com/2015/10/17/a-story-half-told-photo-essays-share-the-lives-of-five-women-living-with-breast-cancer/

Looking through various photo essays on this subject has given me a glimpse into the multitude of ways that my topic could be addressed. I think for me personally, the topic of brain cancer is not one that is as openly discussed. The progression on primary brain cancer is quite different from other forms of cancer. My feelings regarding this topic have a tendency to change from day to day. Today, it is the sub-topic of loss that resonates.

My Fathers journey with brain cancer seems to have been a series of devastating loss, for him and for us as a family. From the loss of his job and ability to work, the loss of independence and the ability to drive or do simple things for himself, the loss of co-ordination and cognitive ability, loss of personality and the person we once knew as our Father to what will be the eventual loss of him. This feels like a very dark direction for my photo essay and not what people want to hear or think about when they think of terminal illness. Yet, it is our day to day life and very much our reality.

Do we create a photo essay that gives people the sunshine and roses and only what they want or do we create a photo essay that gives people the truth, however hard that may be to swallow?

In all honestly, The gold mining topic would be an easy pick. It’s interesting, historical, relevant to my local area and easily accessible. The second topic has the potential to be dark, gritty, uncomfortable. Nothing easy about it, but one that has great meaning to me. What to choose!!!

Colour Management & Workflow: Module 1

X-Rite features a number of colour management and profiling tools aimed towards photographers. The all in one system of the i1Publish Pro2 provides an array of tools to suit a photographer who requires profiling and colour management of multiple different devices and pieces of equipment such as monitors, printers, paper combinations, cameras and scanners.

Photographers who do not require a system as extensive as this might choose to calibrate their monitor with devices such as the i1 Display pro or the ColorMunky Display. Along with colorimeters and spectrophotometers, there are also many different colour/ greyscale tools available to help with colour management during capture.

Datacolor is another company specilaising in colour management tools for photographers. Along with similar colour/greyscale tools as seen above, the SpyderCube seems to be a handy tools for setting exposure, white balance, black levels and brightness.

SpyderCube

Monitor display calibration has several available options on the Datacolor website, such as the SpyderX, an external monitor calibration tool or software options to control monitor profiles.

Activity 1:2

As a windows user, I was unable to experiment with the ColourSync Utility app, however, I was able to understand the difference in the colour spaces from the learning materials and video files provided. It was interesting to see the differences in the size of the available colours in each colour space and to learn how each one might have it’s place for different uses and outputs. I found it particularly interesting that while the CMYK colour space was quite small, it had those blue and green tones far outside of what the sRGB colour space was capable of producing. Personally, I have completed all of my work to date using the Adobe RGB colour space.

It was also interesting to me to consider, as a beginner photographer, the relationship between an uncalibrated monitor and how any edits applied in post production to my images might conflict.

Media & Documentary: Module 1

For this weeks learning activity, I have chosen two possible topics for my photographic essay.

Topic 1:

The first topic is historical in nature and relates to the rich gold mining history that is the foundation for the city of Bendigo. With the city being literally built on top of quartz reefs laden with gold, Bendigo became the second largest gold producing loaction in Australia and seventh largest in the world.

A possible sub-topic for the essay is the involvement of the Chinese who flocked to Bendigo and it’s surrounds to flee violence and poverty and find wealth and prosperity. The Chinese immigrants were met with hostility and prejudice with thousands of Chinese miners hastily laid to rest in segregated, makeshift cemeteries around the city. Despite their less than favorable reception , they brought with them their colourful traditions and as a result, many of their monuments, temples and festivals have now formed a strong part of our community identity.

Topic 2:

This topic is of a more personal nature but one that I feel may benefit others with shared experiences.

The impact of terminal illness on families.

The idea is to follow some of my family members through a month, through multiple different shoots, to show how supporting and caring for a family member with terminal illness involves and impacts the lives of the entire family unit.

Possible angles:

The family unit and how it pulls together to support the family member in all of the various ways required throughout the stages of their illness. How families who live in remote areas cope and adapt to the struggle that distance can have on accessing medical professionals, accessing support and the isolation that can happen as a result.

How the diagnoses and progression of terminal illness impacts the person suffering the illness and the family in not only negative ways but also in positive ways which can be surprising.

As mentioned, this would be a personal topic as it is my Father who suffers from terminal brain cancer. There was no way that we could have prepared for what was to come when he was first diagnosed. It might be beneficial for other families in similar situations to see that they are not alone in these experiences even though it can sometimes feel this way.

There are numerous Australian publications that feature stories from people and families experiencing terminal illness.

Digital Imaging Module 4

This week we are learning more about Lightroom, specifically, how to crop, straighten and begin editing our raw files. I am enjoying learning how to use this program and not finding it as daunting as I had anticipated. It seems so far to be a very intelligent piece of software.

I have edited a few of my own raw images here and included the before and after shots for comparison.

Thinking Visually- Module 3

Here are my five colour themes for the module 3 activity. Once I overcame my apprehension about using photoshop for the first time, I found that I really enjoyed this activity. Looking past the superficial first glance and really taking a moment to appreciate the way that the colour palettes worked cohesively in each image was fascinating.

I am still working on my visual oxymoron, the ideas are there but as we are currently in the process of moving house, the materials are packed.

Digital Imaging- Module 3 Activities

This week in Digital Imaging, we were introduced to the Adobe Lightroom software and were asked to create a catalog to import and organise our images.

I chose to create a couple of different catalogs as I had quite a few personal images mixed up with my study images. I found the process to create the catalog and import the images easy at first but my first roadblock was trying to figure out why my raw files would not come over in the import.

After thinking on this for a little while I remembered that they were saved as a proprietary NEF, Nikon specific file. I opened the NEF raw files in Adobe Bridge, Used the filter to bring up only the raw images and not the JPEGS, selected all images and opened in camera raw. Once in camera raw, I again slected all images and saved them as the DNG file. From there I was able to easily import them into Lighroom.

I will be doing a bit more research to see if there is a function within Lightroom to convert the NEF files to DNG at the time of import so as to save having to go through two other programs first.

My Lightroom catalogs are easily accessible from the “My Pictures” destination on my PC. I have them all stored in one main folder titled ” Lightroom Catalogs”.


I especially liked the ability to create a metadata preset that can be applied to all of the images at time of import and found this function easy to use and set up.

Finally, my images were imported into Lightroom.

Lighting- Module 3 Activities

This week in module 3 we learned about the temperature and colour of different types of light and the role that white balance plays when taking photographs of different subjects in different lighting environments.

I have not completed activity 1 yet due to poor lighting and weather conditions today. The lighting at different times of the day was very dull and cloudy and not strong enough to show any differentiation between the images.

Activity two I completed on my lunch break yesterday and was lucky to have a wonderfully warm, sunny day to take my images.

The following images were taken using my Nikon D3500 cropped sensor DSLR and a tripod. Each image was taken using one of the different white balance modes on my camera.

Daylight
Cloudy
Shade

Incandescent

Fluorescent
Auto

The daylight setting would have been the correct mode given the lighting and time that these images were captured. As a result we can see that the daylight and the auto modes are very similar. The cloudy mode did not deliver an unpleasant image, warming the image up just slightly. Shade mode made the image a bit too warm for my liking. In the incandescent and fluorescent modes we can see the images are tinted, trying to compensate for the orange that is cast by an incandescent light or the greenish tint that is common with harsh fluorescent lighting.

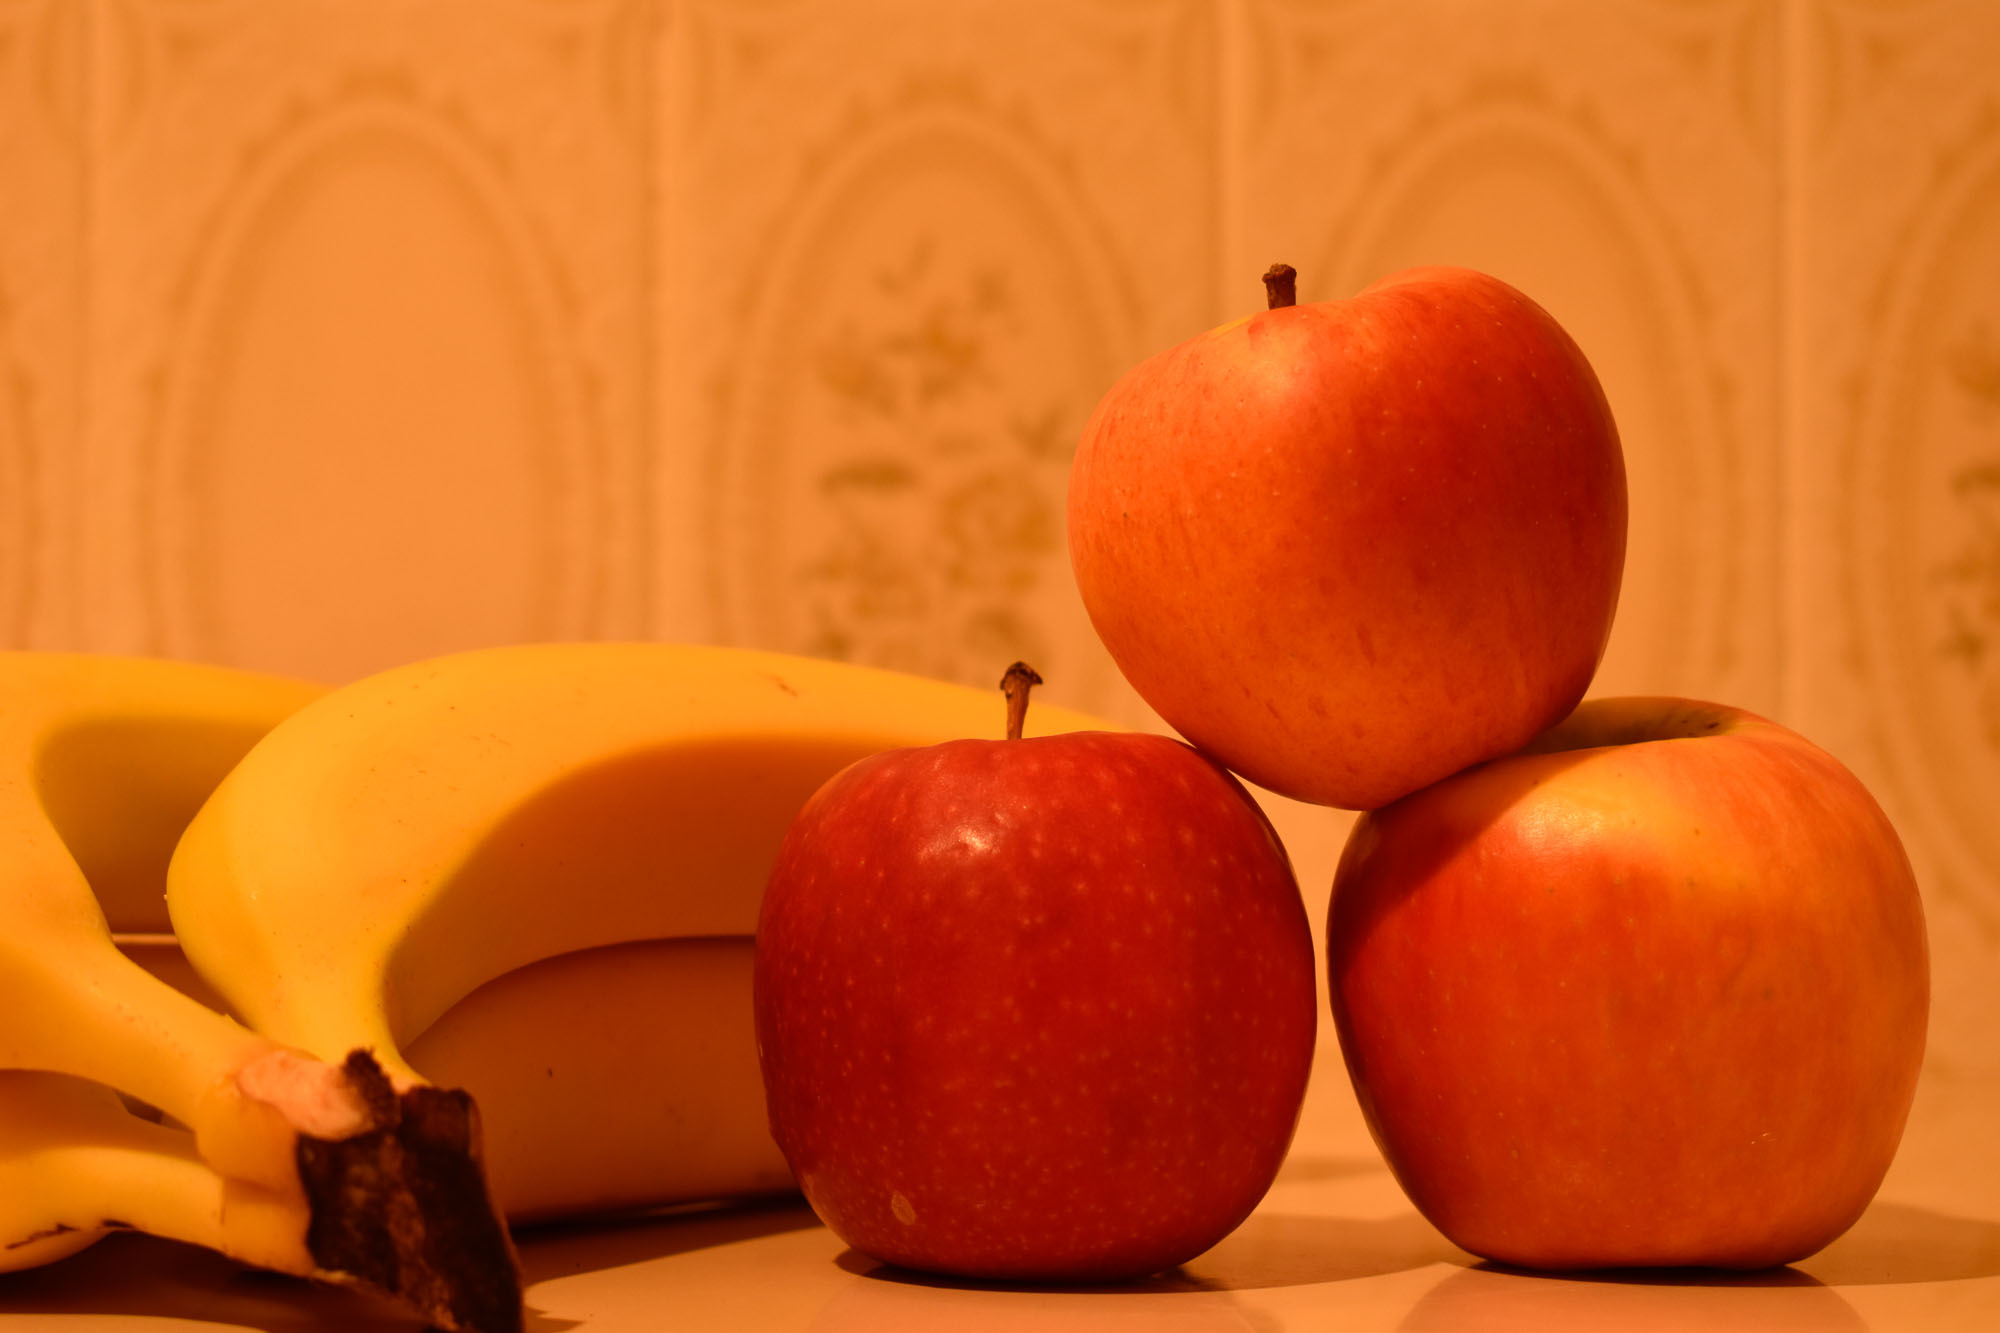
For the next activity, a series of images were captured indoors under artificial lighting. In this case, the lighting was incandescent or tungsten and had a very strong orange quality. The same white balance modes were used but with quite different results to the outdoor images. We see that daylight, cloudy and shade modes did not do very much to counteract the strong orange light. In fact, the warming effect of the shade mode made the image almost unbearably orange. However, the incandescent setting neutralised the orange quite well and would have been able to be balanced even further in post production. The detail on the tiles in the background became much clearer in this mode. The texture of the fruit is more evident in this mode whereas we can see it has been lost in the daylight, cloudy and shade modes. The fluorescent mode is an improvement on the first three modes but still lacks the correct balance for this particular lighting situation.

Daylight
Cloudy
Shade
Incandescent
Fluorescent

For learning activity test, a dismal result due to the constant interruption of two small children who seem to have some sort of sixth sense whenever mum is trying to concentrate. Silly mistakes and rushing through the questions without reading is definitely not recommended!

Camera & Capture- Module 3

This week, we learned about exposure and metering. I found the activities quite enlightening and enjoyed playing around with the exposure compensation feature on my camera.

For the first activity, I used my Nikon D3500 cropped sensor DSLR and tripod to capture the following series of images using a range of exposure compensation settings.

Camera was set to program mode with a fixed ISO of 400. Wide angle focal length was used to capture as much of the scene as possible. The lens was set to 18mm focal length which converts to 27mm once the 1.5x crop factor is applied.

exposure compensation: +3 stops over exposed
exposure compensation +2 stops over exposed
exposure compensation +1 stop over exposed
Correct exposure
exposure compensation -1 stop under exposed
exposure compensation -2 stops under exposed
exposure compensation -3 stops under exposed

In the above images we can clearly see the results of dialing the exposure up or down several stops resulting in either extreme highlights blown out to white or the entire shot being drowned in blacks and shadows. The +1 stop image is the image that I prefer out of all of these. That one extra shot allows just enough extra light in to lift the image without losing definition in any of the detailed areas.

Next we experimented with exposure compensation with a white and a black static subject. I found it interesting how far I had to adjust the exposure to get a true indication of the black and white colours as the correct exposure for each was very inaccurate. We learned about metering and 18% grey during this exercise.

The images were all taken in aperture priority mode instead of program mode as I had forgotten to change the mode back after taking another image. The same scale of exposure compensation was used for both the black and white images: +3 stops, +2 stops, +1 stops, correct exposure, -1 stops, -2 stops and -3 stops.

Correct exposure

Top from left to right: -1 stop, -2 stops, -3 stops.

Center: correct exposure.

Bottom from left to right: +1 stop, +2 stops, +3 stops.

I think in this instance, 2+ stops gives the more accurate representation of the white paper, with + 3 stops being much too white and greatly over exposed. If there were any details on the paper they would be lost in the blown out highlight of the +3 stop image.

Top from left to right: -1 stop, -2 stops, -3 stops.

Center: correct exposure.

Bottom from left to right: +1 stop, +2 stops, +3 stops.

In this series of images, the image that is -2 stops under exposed is probably the most accurate representation of the black colour however the back ground is also darkened quite significantly and there is a loss of detail on the white text on the cover. The -1 stop under exposed image seems to have a bit more balance of the darker black cover without drowning out the background and highlights in shadow.

All in all, it was an interesting an enlightening module which I found to be profoundly useful when getting out and about taking shots.

Digital Imaging – Module 2

This week we learned about digital asset management aka DAM. Backing up own images and work is something that is often overlooked by many people. That is, until they suffer a catastrophic hardware failure at some stage in their life. If I know anything about computers, it’s never a matter of if they fail but when.

As aspiring professional photographers, a bullet proof back-up is essential. One can only imagine how gut wrenching it would be to lose client files, especially those that can never be re-captured such as those taken from a wedding shoot.

A 3-2-1 backup system involves having three copies of your work saved, including your master copy or source files. Two copies kept locally but on separate media devices, for example: one copy saved locally on your computer internal drive (space allowing) and the second copy saved to a separate removable hard drive. If your internal drive does not allow for storage of large RAW files then the first two copies of your back up can be removable hard drives as long as they are two completely separate drives.

The third copy of your files should be on yet another separate device but one that is stored offsite. This gives yet another layer of protection should the unthinkable happen such as fire, flood or zombie apocalypse.

At present, my 3-2-1 back up system comprises of master files saved to my desktop hard drive, although I suspect in the near future I may have to expand to a larger drive.

Secondly, I back up a copy of this work to a removeable hard drive. The one I currently use is a 6TB WD My Book external drive. At the time of writing this, my external drive was on vacation at my work place to do a somewhat overdue backup of the work computer ( naughty naughty), although it usually resides at home.

The final stage of my back up system is to save all of my files to the cloud. I use cloud storage with Dropbox. For a smallish monthly fee, I have unlimited storage space, the ability to access my files from anywhere with an internet connection and can share links to my files with other people at my leisure.

I was interested to learn about RAID systems as an option to add to my back-up system and also liked the idea of a camera body with dual card slots to protect against corrupted SD cards. Definitely two options I will be exploring further when funds allow.

Thinking Visually – Module 2

In this weeks activity we have selected four images without captions that resonate with us. We are to analyse the images with the following questions in mind:

  1. What is going on in this picture?
  2. What do you see that makes you say that?
  3. Look again at the image: What more can you see?
  4. Give each image a title that you feel fits the content.

Image 1:

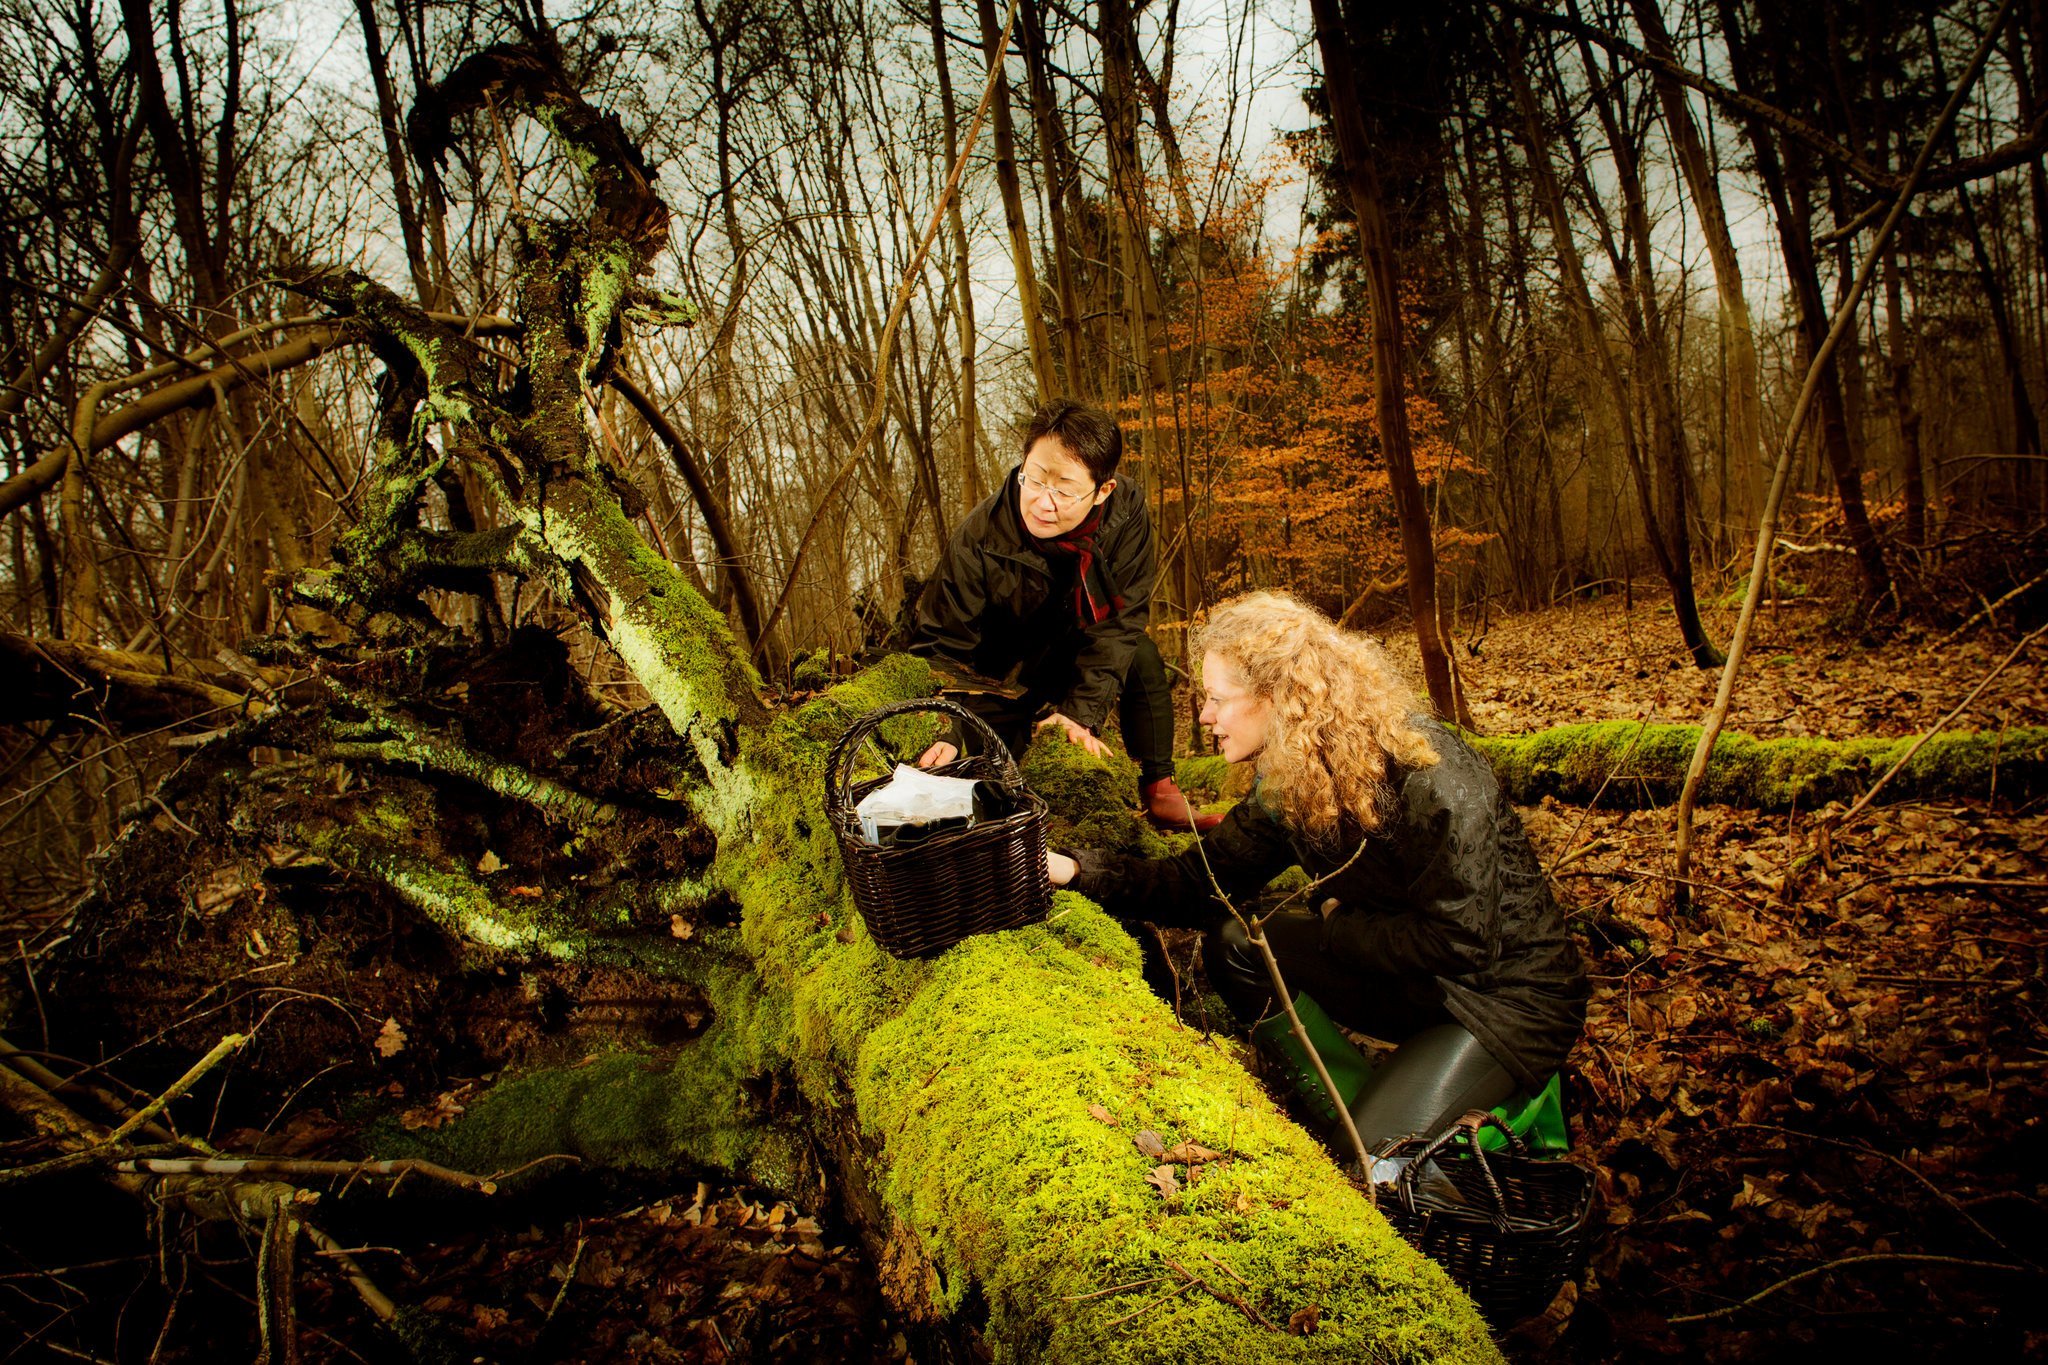
Foraging

Reflection: Two women in a fairly dense forest have converged upon a fallen tree that has over time, become covered in moss and fungus. They seem fascinated by what they have discovered with the fallen tree and the baskets that they have rested on top of and to the side of the trunk suggests that maybe they are in the forest together to explore and forage. The clothing worn by the woman and the overall colour of the surrounding foliage would be conducive with Autumn. Autumn is a popular time for foragers to take to the forests to collect wild and edible fungi and plants.

From Death There Is Life

Reflection: A small plant with delicate white flowers has sprung forth from the earth in front of a gravestone. A man leans over to inspect the flowers with a joyful look on his face. His notepad and pencil, along with his back pack suggest that he is studying the plant. This is a compelling image because at first glance, it would appear that the man is lying on the grave of a lost loved one, grieving and alone. The monochrome tone to the image certainly helps to deliver this initial impression. It is only upon much closer inspection that we realize the man is in fact happy to be where he is and is not lying on the ground in paroxysms of grief and despair.

Just Keep Swimming

Reflection: In this image I see a neighborhood decimated by war. The buildings barely stand, piles of rubble from the attack gather around the entrances. I feel this has been a war-torn area for quite some time. The local children are enjoying a swim in a crater that has filled with water. They appear to be smiling and having fun. This leads me to think that they are no strangers the after effects of war and have learned to find joy and happiness wherever they can. They swim and play as other young boys do because this is their normal.

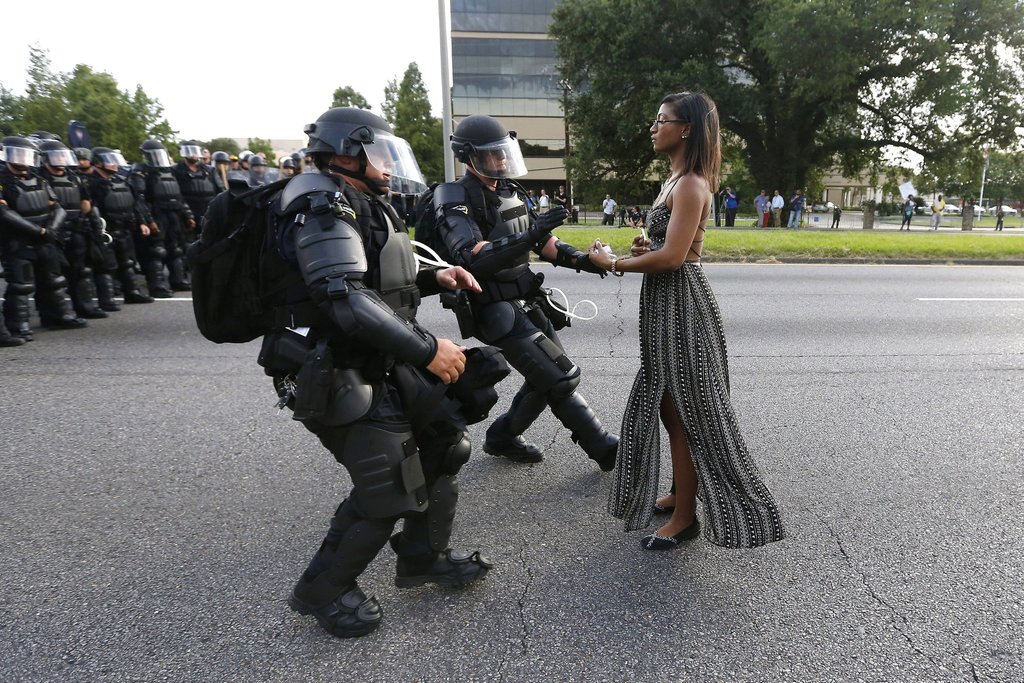
Calm Before The Storm

Reflection: I believe that this image was captured during a riot. I see the riot police in the back ground, in uniform and creating a blockade across the street. They are standing somewhat casually, suggesting that they have not yet engaged with any opposition but are prepared for that possibility. One, lone woman of colour approaches the two riot police who are stationed in front of the other officers. Her expression is stoic and strong. Her body language, the positioning of her hands, sends the message that she comes to deliver a message, perhaps unspoken. She shows great dignity and poise. The police officers before her are taken aback. It appears that her action has caught them off-guard. Perhaps they have broken formation to intercept her approach. They are displaying defensive body language, as if they are unsure of her motives and are prepared to defend themselves if the need arises. Across the street, a small crowd watches the events unfold. The number of riot police suggest a larger crowd of protesters approach. It is possible this woman approaches with the intention of diffusing what could quickly develop into a violent confrontation.